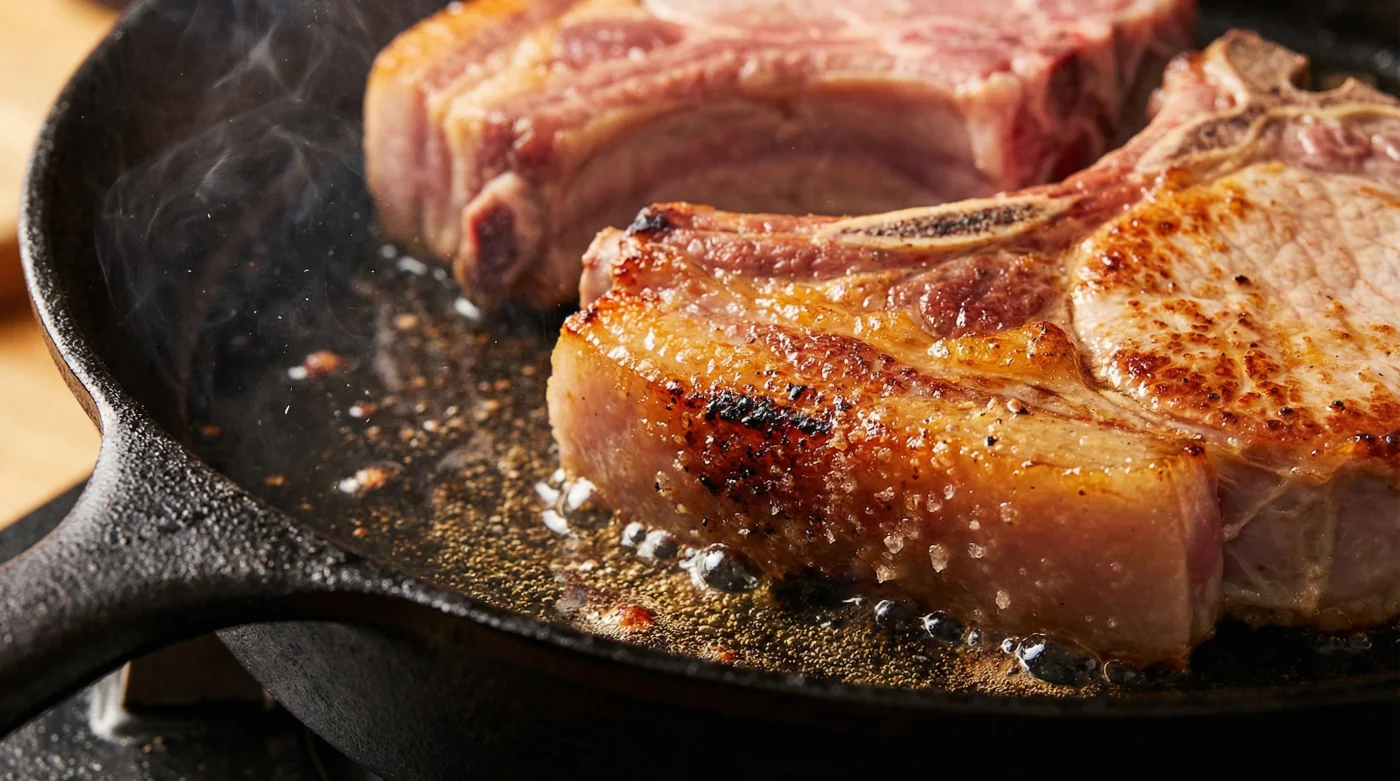
Picture the scene. It is a brisk evening, the kind where the kitchen windows fog up just slightly from the warmth of the stove. You have a heavy cast-iron skillet warming over a medium flame, radiating a steady, comforting heat. Beside the stove sits a pair of thick, bone-in pork chops, their surfaces patted perfectly dry, generously seasoned with coarse salt, and waiting for the fire.
Most of us learned a very specific rhythm for cooking meat. You lay the chop flat against the screaming hot metal, listen to that violent, sputtering hiss, and wait for the Maillard reaction to do its work. But when you eventually pull that meat from the pan and slice into it, a glaring flaw remains. That thick band of fat running along the outer edge hasn’t melted. It sits there, a resilient, chewy white border that ruins the texture of an otherwise perfectly cooked dinner.
We tend to view this fat as an unfortunate byproduct of the cut, something to be trimmed away at the table and pushed to the side of the plate. It feels like a failure in the cooking process, a rubbery barrier standing between you and a satisfying meal. It feels as though the meat itself is working against your efforts to create something delicious.
But the problem isn’t the meat, and it certainly isn’t your skillet. The flaw lies entirely in the geometry of how you approach the pan. By simply turning the chop on its side, you transform that stubborn edge into a crispy, golden-brown advantage.
The Gravity of a Proper Render
Think of that fat cap not as a part of the meat to be cooked, but as a solid block of cooking oil waiting to be released. When you lay a chop flat immediately, the intense heat sears the lean muscle but barely grazes the outer edge. The fat is insulated, remaining tough and unrendered while the centre of your dinner dries out from overcooking.
To fix this, we need to completely reverse the order of operations. Imagine a candle melting from the top down. When you rest the meat upright, directly on its fat cap, the gentle, sustained heat begins to break down the lipid structures. The fat softly weeps into the pan, creating a shallow pool of liquid gold that will eventually fry the rest of the cut to perfection.
Elias Thorne, a 58-year-old butcher who has spent three decades working behind the cold cases at Toronto’s St. Lawrence Market, watches this mistake happen daily. He hands over beautiful, two-inch thick cuts of local pork, knowing most customers will rush the process at home. “People treat a chop like a steak, slapping it down on the widest side right away,” he explains, wiping down his block. “You have to make them stand at attention first. Let the fat melt out until that edge looks like a strip of good bacon. Only then do you let the meat touch the iron.”
This single, structural shift completely alters the dynamic of your cooking. Instead of adding extra oil to the skillet, you are cooking with its own reserves, building layers of flavour that cannot be replicated by pouring canola oil out of a plastic bottle. The fat cooks the meat, and the meat flavours the fat.
Adapting the Stand-Up Method
Not all cuts are created equal, and the way you approach this upright rendering technique must adapt to the physical realities of the meat on your cutting board. A rigid formula often fails in the kitchen; observation is your most valuable tool.
For the thick, double-bone behemoths you might source from a specialty butcher, the upright rest is almost entirely hands-off. These cuts are wide enough to balance on their own. You simply set them on their edges, lower the heat to a moderate 160 Celsius, and let them gently render for several minutes without risking a burned crust on the lean muscle.
But what if you are working with the standard, thinner supermarket cuts? These chops lack the structural integrity to stand upright independently. They will want to flop over, exposing the lean meat to the pan prematurely and defeating the entire purpose of the exercise.
The solution here requires a bit of mechanical intervention. Take your kitchen tongs and squeeze the two chops together, fat sides facing down in the same direction. By clamping them as a single unit, you create a stable, wide base of fat that can be pressed firmly against the hot metal until the rendering is complete.
- Discarded celery leaves baked completely dry create premium savory finishing salts.
- Sour cream thinned with cold lime juice creates elegant restaurant drizzles.
- Split chocolate ganache recovers factory smoothness using drops of boiling milk.
- Canned lentils roasted dry in hot ovens mimic expensive sausage crumbles.
- Pork chops started in freezing cold pans render perfect crispy fat.
You must aggressively pat the fat cap dry with a paper towel before it ever sees the stove. If sugar or maple syrup is present in the marinade, you need to monitor the heat closely, as the sugars will caramelize and burn rapidly long before the lipids have a chance to melt down.
The Architecture of the Upright Sear
Executing this technique requires a mindful slowing down of your usual frantic dinnertime pace. It is an exercise in patience and thermal management. You are not just cooking dinner; you are managing a controlled melting process.
Approach your stove with intention. Ensure your skillet is large enough to comfortably hold the meat without crowding, which drops the temperature and causes steaming. Have your tongs ready, and trust the physical cues the food gives you over the strict timing of an inherited recipe.
- Initial Pan Temperature: Start with a medium-low heat (around 150 Celsius). A screaming hot pan will scorch the fat before it can melt.
- The Upright Time: Hold or balance the chops on their fat edge for 4 to 6 minutes. Watch for the edge to turn a deep, crackling golden colour.
- The Lean Sear: Once the pan is slick with rendered liquid, increase the heat slightly and lay the chops flat. Cook for 3 to 4 minutes per side in their own fat.
- The Rest: Remove from the heat when a meat thermometer reads 60 Celsius in the centre. Let the meat rest for 10 minutes on a cutting board so the juices redistribute.
Notice how the sound of the pan changes during this process. It starts as a quiet sizzle as the fat cap warms, shifting into a more aggressive popping as the moisture cooks out and the pure fat remains behind in the skillet.
When you finally lay the meat flat into that shimmering pool, the resulting crust is distinctly different. It is deeply browned, crackling, and entirely uniform, having been fried in its natural environment rather than scorched against dry, unlubricated iron.
Moving Beyond the Sizzle
Mastering this minor geometric adjustment does more than just improve the texture of a Tuesday night dinner. It reorients how you interact with raw ingredients. It forces you to look at a piece of food not as a monolithic object, but as a collection of different tissues, each requiring a specific approach.
By rendering the fat first, you eliminate unnecessary waste. The part of the meal that used to be discarded into the compost bin becomes the most coveted bite on the plate. You bring a sense of professional efficiency and respect into your home kitchen, honouring the ingredient by utilizing every part of it to its maximum potential.
It is a quiet victory over the mundane frustrations of home cooking. You no longer have to settle for chewy, unappetizing borders. You hold the mechanics of the kitchen in your own hands, turning a perceived flaw into the very foundation of a spectacular, restaurant-quality meal.
“True cooking isn’t about forcing heat onto an ingredient; it is about coaxing the ingredient to reveal what it already holds inside.”
| Key Point | Detail | Added Value for the Reader |
|---|---|---|
| Temperature Control | Start at 150 Celsius for the fat cap. | Prevents the fat from burning before it can melt, ensuring a crispy, edible edge. |
| Tongs Technique | Clamp thin chops together upright. | Allows cheaper, thinner cuts to render properly without falling over into the pan. |
| Moisture Management | Pat the fat cap completely dry. | Stops the meat from steaming, guaranteeing a crackling, bacon-like crust. |
Frequently Asked Questions
Why is my fat cap still chewy after doing this? You likely started with the heat too high. High heat sears the outside of the fat but traps the tough structure inside. Lower the heat and let it melt slowly.
Can I do this with boneless chops? Absolutely. Boneless chops actually benefit even more from this method, as they tend to dry out faster and desperately need the rendered fat for a juicy sear.
Do I need to add any oil to the pan first? Usually, no. If your pan is well-seasoned and the chop has a decent fat cap, the meat will provide all the cooking fat you need within the first few minutes.
What if my chops keep falling over? If you don’t want to hold them with tongs, you can lean them against the side of the skillet or prop them up against each other like a tepee.
Does this work for steaks too? Yes, this technique is identical for thick-cut steaks like a New York Strip that feature a distinct band of fat along one side.