The air in the kitchen smells faintly of toasted flour and anxiety. You stare at the wide metal basin sitting on the counter, knowing exactly what the afternoon demands. The recipe card mocks you: ‘cut in the fat until the mixture resembles coarse meal.’ It sounds peaceful, like sweeping up autumn leaves, but reality is a sticky, frustrating mess that leaves your shoulders tense.
Your hands hover over the bowl. You know the exhausting drill. Fingers pinching rigid fat, trying to rub it into the pale dust before the ambient temperature of your own blood melts the dairy into a greasy paste. Ten minutes in, you are left with a shaggy, yellowed lump that eventually bakes into something resembling sweet cardboard.
You have been told that pastry is a high art reserved for grandmothers and Parisian cafe veterans. The truth is far less romantic. The professional reality relies entirely on mechanical efficiency, not magical fingertips. What if the most effective method was actually the one that felt like cheating?
The secret to a shattering crust isn’t suffering through the technique. It is sheer, cold friction. When you stop trying to massage the ingredients and start treating them like structural components, the entire process changes from a chore into a brief, satisfying victory.
The Mechanics of Flaky Layers
Think of a perfect pie shell not as a uniform dough, but as an architectural stack. Water and flour form the concrete; cold fat forms the temporary scaffolding. When that fat hits a 200 Celsius oven, the water inside it steams, pushing the layers of dough apart like opening an accordion.
If the fat softens before baking, you lose the architecture. The warmth of your hands is the sworn enemy of this delicate structure. This is why traditional pastry blenders require so much elbow grease, forcing you to mash rigid blocks while the clock relentlessly ticks.
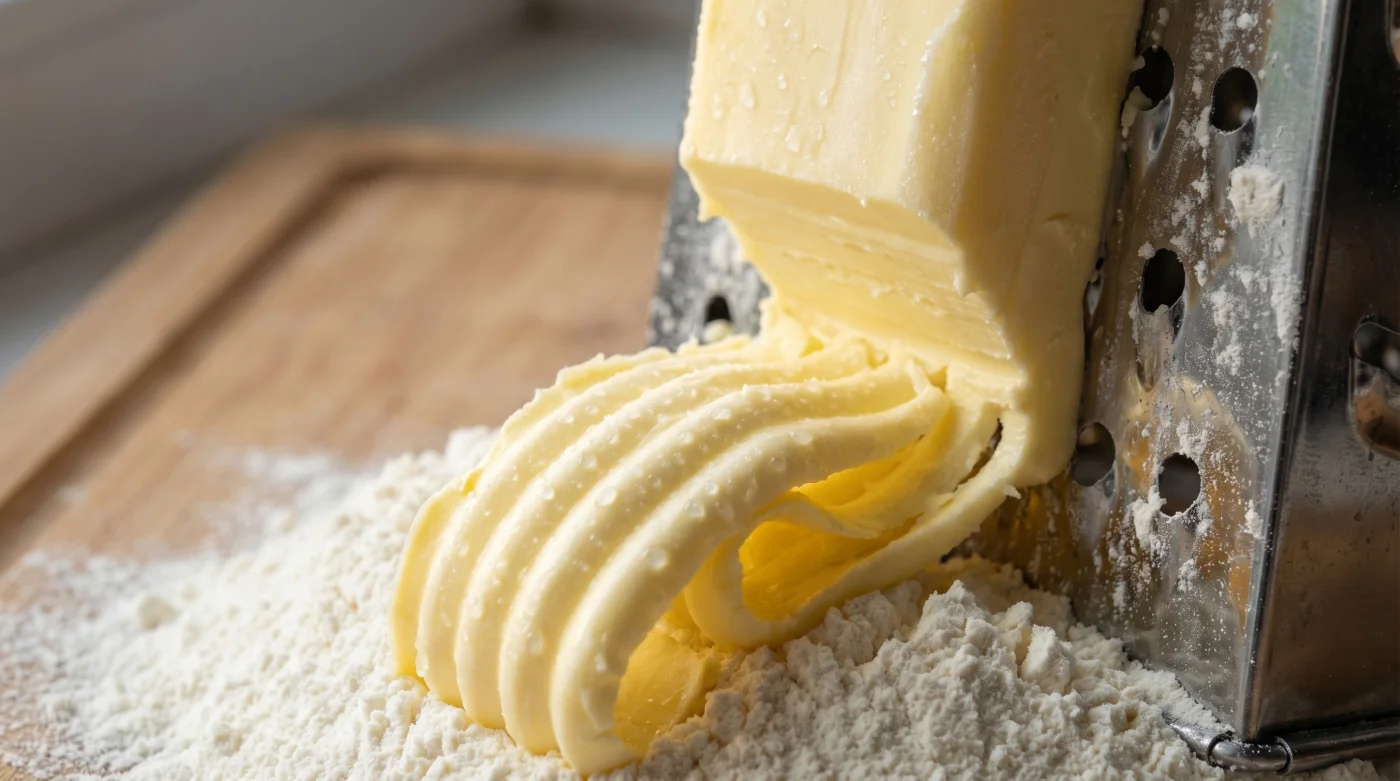
Here is where the lazy fix becomes your greatest asset. Instead of fighting the block with a blunt tool, you shred the hard block using a standard box grater. It reduces the surface area instantly, creating hundreds of uniform ribbons that barely need to be touched.
You are no longer blending a heavy mass. You are tossing a salad. By dropping these frozen ribbons into the dry ingredients, you coat the fat in flour immediately, insulating it and preventing the strands from clumping back together.
Consider the approach of Clara, a 42-year-old baker running a small farm-to-table operation outside Halifax. For years, she lost sleep over the inconsistent texture of her seasonal fruit galettes, battling humid Maritime summers and the sheer physical exhaustion of hand-cutting twenty kilos of fat a week. Then, she threw a block of dairy in the freezer and pulled out a heavy-duty cheese grater. The result was a revelation. Not only did it cut her prep time by eighty percent, but the crusts baked up with a glassy, shattered flakiness she had never achieved before. The shortcut had completely outperformed the tradition.
Adjusting for Your Environment
Not all kitchens breathe the same way, and flour behaves differently depending on the weather outside your window. Adapting to your specific space ensures the shredded ribbons behave exactly as you need them to, without surprises.
For the Warm-Handed Baker
If you are someone who melts chocolate just by looking at it, your strategy requires extreme thermal management. Freeze your grater alongside the butter. When you shred the fat, do it directly into the chilled bowl of flour, using a wooden spoon to toss the ribbons like delicate pasta so your fingers never make contact.
For the High-Humidity Kitchen
Summer baking in damp air means your dry ingredients act like a sponge. Hold back your ice water. The shredded dairy will already contain moisture, and the ambient humidity means you only need a few spoonfuls of liquid to coax the shaggy mess into a cohesive disk.
For the Bulk Preparer
If you want to bake flaky quick crusts on demand for holiday dinners, shred several blocks at once. Toss the ribbons lightly in a few spoonfuls of flour and freeze them in sealed containers. You now have a proprietary mix ready to be deployed at a moment’s notice, eliminating the mess on baking day.
The Five-Minute Assembly
This technique thrives on deliberate, minimalist actions. Hesitation is your only enemy when assembling the components. Set your workspace up so you never have to walk away once the grating begins.
Treat the process like a quiet meditation. You want the metallic scrape of the grater to be the loudest sound in the room. Here is your assembly protocol:
- Place your solid block in the freezer for exactly 30 minutes before you begin.
- Weigh your flour, salt, and sugar into a wide, shallow metal bowl.
- Grate the firm fat on the largest teardrop holes of your box grater, stopping halfway to toss the ribbons in the dry mix.
- Drizzle your ice water over the coarse mixture, using a fork to lift and fold rather than stir.
- Press the loose clumps together just until they hold a shape, then wrap tightly and chill.
The magic happens when you step away from the counter. Resting allows hydration to equalize, relaxing the gluten strands you inadvertently agitated while folding the water in.
Keep your tactical toolkit simple: your fat must be between -5 and 0 Celsius, your tool must be a chilled stainless steel box grater, and your total manipulation time should remain under four minutes.
Reclaiming the Joy of the Bake
We often punish ourselves in the kitchen, assuming that if a process isn’t arduous, it isn’t authentic. We romanticize the struggle, believing that the sweat on our brow directly translates to the flavour on the plate.
By embracing this streamlined method, you reject all unnecessary suffering. You are allowing yourself to focus on the pleasure of creating something from scratch, rather than dreading the mechanics of it. The anxiety of tough pastry dissolves into thin air.
When you pull that golden, blistered disk from the oven, you won’t taste the hours you didn’t spend massaging fat into dust. You will taste the crisp, buttery shatter of a method executed with quiet precision.
Baking should never feel like a chore you have to conquer. It is an act of nourishment, starting first with the grace and efficiency you extend to yourself at the kitchen counter.
The grater does the work your hands were never meant to do, preserving the chill that creates true pastry magic.
| Key Point | Detail | Added Value for the Reader |
|---|---|---|
| Hand-Cutting | Requires 10-15 minutes of constant pinching and mashing. | Teaches dough feel, but risks melting the fat and ruining flakiness. |
| Food Processor | Pulses ingredients in seconds using rapid steel blades. | Extremely fast, but easily overworks gluten, resulting in tough crusts. |
| Grating | Shreds frozen blocks into thin ribbons instantly. | The perfect lazy fix: keeps fat cold, requires zero special equipment, and guarantees flaky layers. |
Frequently Asked Questions
Do I have to freeze the butter completely solid?
It does not need to be a brick of ice, but 30 minutes in the freezer firms it up enough so it glides across the grater without mushing into the metal holes.Can I use margarine or vegan sticks for this method?
Yes, provided they have a high fat content and are frozen prior to grating. Low-fat spreads contain too much water and will turn to slush.What if the grater slips and makes a mess?
Grate directly into your wide bowl of flour. The flour catches the flying ribbons and immediately coats them, keeping your counters perfectly clean.Why does my crust still shrink in the oven?
Shrinkage happens when gluten is overworked or the dough isn’t rested long enough. Ensure you chill the wrapped dough for at least an hour before rolling it out.Is it normal for the dough to look incredibly dry and crumbly?
Absolutely. The dough should barely hold together when squeezed. It will hydrate fully as it rests in the fridge, preventing a tough final bake.