The metallic crack of a tin can opening is usually the sound of a weekday compromise. You peer into the murky, viscous liquid holding those little black orbs, and your mind immediately jumps to the standard, simmering routine. A quick rinse, a splash of water, and a low heat to coax them into submission. It is a wet, heavy process that yields a familiar, albeit predictable, porridge-like texture.
But what if you completely ignored the liquid? Imagine pulling a heavy baking sheet from the oven, the air filling with the scent of toasted cumin and smoked paprika. You hear a distinct, dry crackle as the spatula scrapes across the parchment paper.
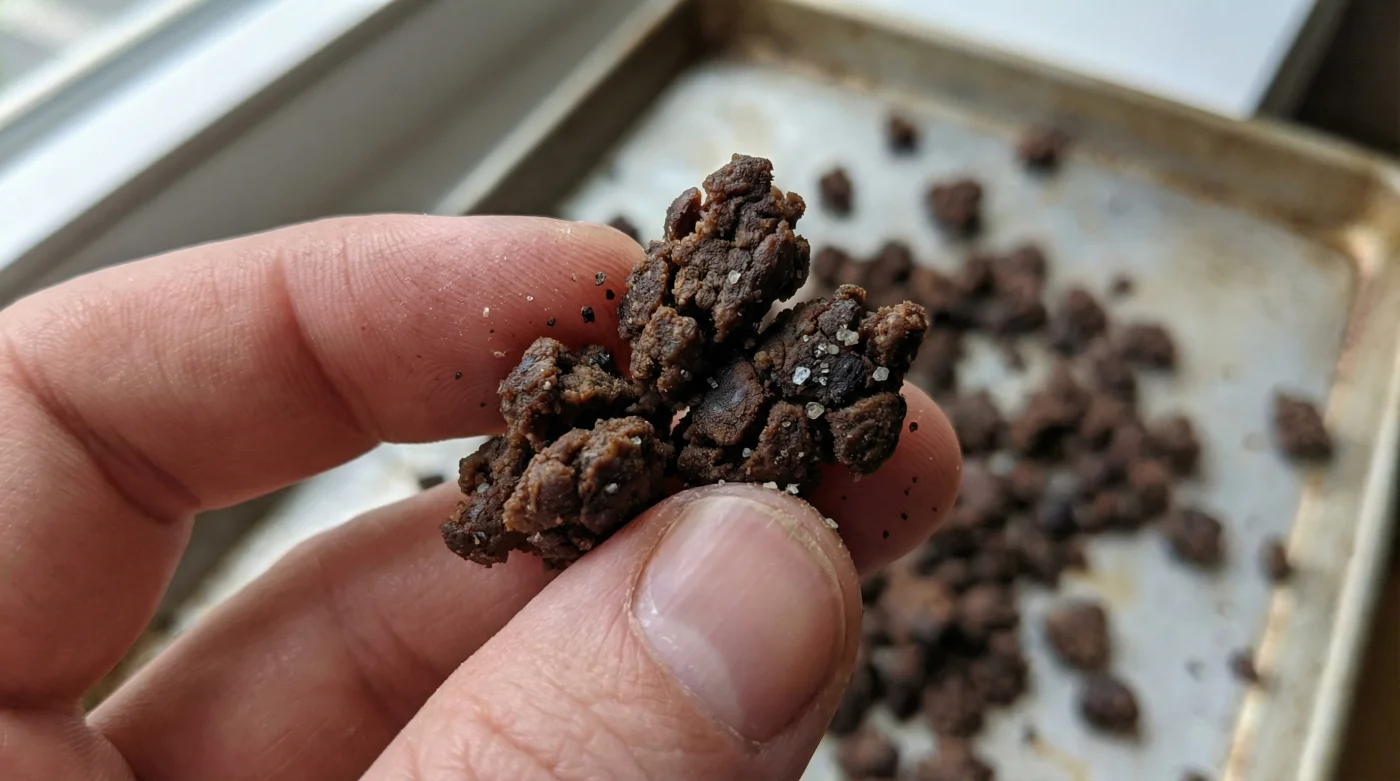
Instead of mush, you are left with rugged, chewy fragments that bite back. This isn’t just another way to heat up a pantry staple; it is a structural metamorphosis. By deliberately driving away the moisture, you coax a humble canned good into behaving remarkably like premium ground meat.
The Perspective Shift: From Simmering to Scorching
Most of us treat canned beans as if they are fragile water balloons, terrified they will dry out. We drown them in broth or bury them in sauces. Yet, when you shift your perspective and treat them more like damp clay ready for the kiln, everything changes. The heat of a dry oven forces the moisture out, collapsing the internal starchy matrix.
It is a deliberate dehydration. As the water evaporates, the exterior skin blisters and hardens, creating a concentrated, chewy density. Think of it like baking a wet sponge until it turns into a sturdy, porous pumice stone. This is the secret to replicating the mouthfeel of browned ground beef or pork crumbles.
Consider the realization of Elias, a 28-year-old prep cook working in a bustling Halifax cantina. Tasked with finding a meatless taco filling that wouldn’t turn the tortillas into a soggy mess, he accidentally left a strained batch of black beans in the convection oven during a busy Friday service. When he pulled the forgotten tray out, they weren’t ruined; they had undergone a fortunate, high-heat structural shift.
Those shrivelled, deeply browned nuggets held spice better than any simmering pot ever could. An accidental five-minute prep routine became the restaurant’s most guarded menu secret, saving them hours of stovetop labour while dramatically reducing their grocery overhead.
Adjustment Layers: Tailoring the Texture
The beauty of this viral five-minute prep method lies in its extreme adaptability. Once you master the basic dehydration technique, you can manipulate the final product to suit whatever craving strikes. You only need to control the final brittle snap by adjusting how you treat them before they hit the heat.
For the Taco Purist
You want aggressive seasoning and a varied texture. Lightly crush about a third of the beans with the back of a fork before baking. This creates uneven, jagged edges that crisp up fiercely in the oven, mimicking the varied sizes of browned ground chuck. Toss them aggressively with chili powder, oregano, and a splash of neutral oil.
For the Weeknight Bolognese
Here, you need structural integrity to survive a simmering pot without dissolving. Keep the beans entirely whole and do not crush them. Once they are baked to a dry, chewy state, fold them into your sauce only during the last two minutes of cooking. They will absorb rich tomato liquids seamlessly without losing their meaty resistance.
For the Salad Cruncher
If you want a protein-packed crouton alternative, push the baking time even further. You want them completely brittle. Toss them in nutritional yeast and garlic powder, letting them bake until they sound like small pebbles rattling on the baking sheet.
Mindful Application: The 5-Minute Prep Routine
Creating this meaty substitute is a masterclass in deliberate, minimalist kitchen actions. The active work takes barely five minutes before the heat takes over. The oven does the heavy lifting, giving back your evening hours.
Begin by rigorously draining and rinsing the canned black beans under cold tap water. The goal is to wash away every trace of the starchy canning liquid. Shake the sieve until the dripping completely stops.
Next, turn out the beans onto a clean, lint-free tea towel. Gently roll them back and forth. You want them dry to the touch, breathing through the woven fabric, removing any surface moisture that would cause them to steam rather than roast.
Transfer the perfectly dry beans to a parchment-lined baking sheet. Drizzle with a high-heat oil and your chosen spices, using your hands to ensure every single bean is coated. Spread them out so they have personal space; overcrowding creates a steam bath.
The Tactical Toolkit
- Oven Temperature: 200°C (Convection preferred for maximum airflow).
- Preparation Time: 5 minutes of active drying and seasoning.
- Baking Time: 20-25 minutes, tossing halfway through.
- Primary Tool: A large, rimmed baking sheet and a highly absorbent kitchen towel.
The Bigger Picture: Finding Peace in the Pantry
There is a profound sense of security that comes from knowing how to manipulate the absolute basics. When the price of groceries climbs, or when you simply forget to thaw something for dinner, staring down a tin can doesn’t have to feel like a defeat. It becomes an invitation to culinary creation.
By taking a wet, mundane ingredient and forcing it into a dry, rugged state, you aren’t just making a quick dinner. You are reclaiming your time and taking control of your food’s architecture. That satisfying, meaty bite isn’t a compromise; it is a hard-won victory pulled straight from your own pantry.
“The magic of cooking happens when you stop fighting an ingredient’s nature and start manipulating its physical environment.” — Clara Evans, Plant-Based Menu Consultant
| Preparation Method | Textural Outcome | Added Value for You |
|---|---|---|
| Standard Stovetop Simmering | Soft, porridge-like, mushy | Quick to heat, but lacks bite or satisfying chew. |
| Light Pan-Frying | Slightly blistered, soft interior | Adds a bit of flavour, but falls apart in heavy sauces. |
| Oven Dehydration (200°C) | Rugged, chewy, meat-like crumbles | Transforms a cheap pantry staple into a premium-feeling protein. |
Pantry Secrets FAQ
Do I need to dry the beans completely before baking?
Yes. Any remaining water will cause the beans to steam, preventing the crisp, meaty texture from forming.Can I use a different type of bean?
While chickpeas work for crunch, black beans have the ideal starch content and dark colour to replicate the mouthfeel of ground beef.How long do these keep in the fridge?
Once baked, store them in an airtight container for up to four days. Reheat them in a dry skillet to bring back the crisp edges.Is oil strictly necessary for this method?
A light coating of oil conducts heat evenly across the bean’s skin, accelerating the blistering process and carrying the spices.Will they hold up in a chili or stew?
If you want them to retain their chew in liquid, add them during the final minutes of cooking right before serving.